Trips and Tripview
Table of Contents
What is a trip and how to use it?
Many people use the Protegear platform to share trips with their friends and family. You can use trips to share your location and also manage what the other people can see. In this post I will show you how to use trips, how you can manage the data which is displayed and much more.
What is a trip?
Well most people know what a trip is. A trip is a journey from one place to another. In the Protegear platform a trip is a recording of location data which is sent by one or more devices.
How to create a trip?
Use the Protegear web console, navigate to the menu Data Services / Trips and click on the Plus button in the lower right corner of your window.
You will now see a complex form, but don't worry, most of the data is already filled in.

First you should change the name of the trip, to identify it later. You can create as much trips as you want; and you should create different trips for different purposes. So let's do this and give the trip the name "My first trip". Now click th red Save button in the upper right corner. As this is a new trip, the button will show as a + sign. As soon as the trip is saved, the button will change to a classical Save button.
As soon as you saved the trip, a small arrow is displayed next to the name of your trip, as part of the entry field for the trip name. You can now click on this arrow to open the trip in a new browser window.

The new trip will be displayed in a new window:
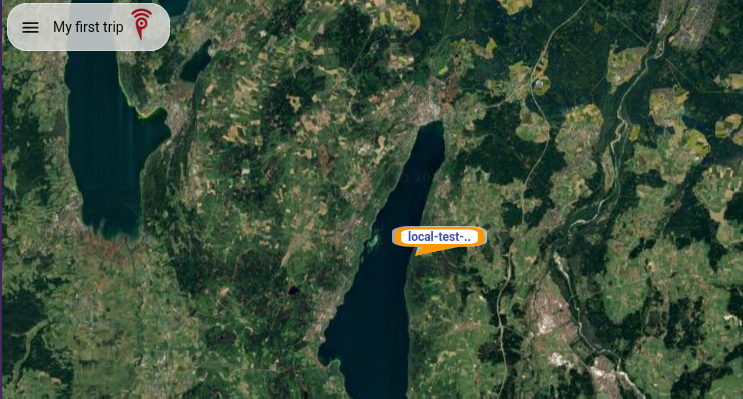
You can click the hamburger menu to see all contained devices or click on a device icon to open the current information about this device. If you do not see a device in the map, although you think there should be one because you selected it in the settings, please check if the device has sent a position information since the beginning of the trip (use the Protegear Console to query the device events). If you set the start date of the trip to some date but you have not powered on your device since then, the device will not be displayed in the map.
Privacy
A trip is a public URL, so everyone who knows the URL can access the map with the shown data. This is really great, if you want your friends or family to track while you are on the road. But as soon as your trip is over, you can disable the location sharing. This can be done in two different ways:
- Set the start and end date of the trip.
This is the easiest way to disable further recording. Any location data sent by your device after the end date will not be displayed. Your trip still exists and all data will be displayed, but the timeline is cut off after the end date. - Disable the trip sharing
You can set privacy option to Close on end. This will disable the trip sharing. Everyone who knows the URL will not be able to see the trip anymore. They will get an error message, that the trip is not public available anymore.
Please note, that you can always change the start and end date of a trip; the system will recalculate the shown data and eventually show/hide some locations. You can also create a trip with a start and end date in the past. The system will query the database and display all matching device events. So if you want so see a specific trip from the past: just create a trip with a start and end date.
GPX Export
Sometimes you want your trip data in a GPX file. You can export the trip data as a GPX file. This will download a file with the trip data in GPX format. This download is only enabled in tripview if you enable this function in the trip settings. Please note that anyone who knows the URL can download the GPX file and store your location data offline.
Popup information
The section for the popup information simply shows which information is displayed in the popup window. These information can be changed every time; the users who are viewing the map will see the information which is set here. Be aware that this is not a privacy setting. All the information is public available; it is not shown in the popup window, but it is transmitted to the users browser.
Device selection
Last but not lease you should select which devices are part of the trip. All of your devices are shown in a list; you have to select the devices you want to be shown.
Tripview
After you created the trip, you can view it in the tripview. The tripview is a special view of the Protegear platform which shows the trip data in a map. You can show tracking lines, zoom in/out, download GPX (if enabled), inspect the popup information and much more.
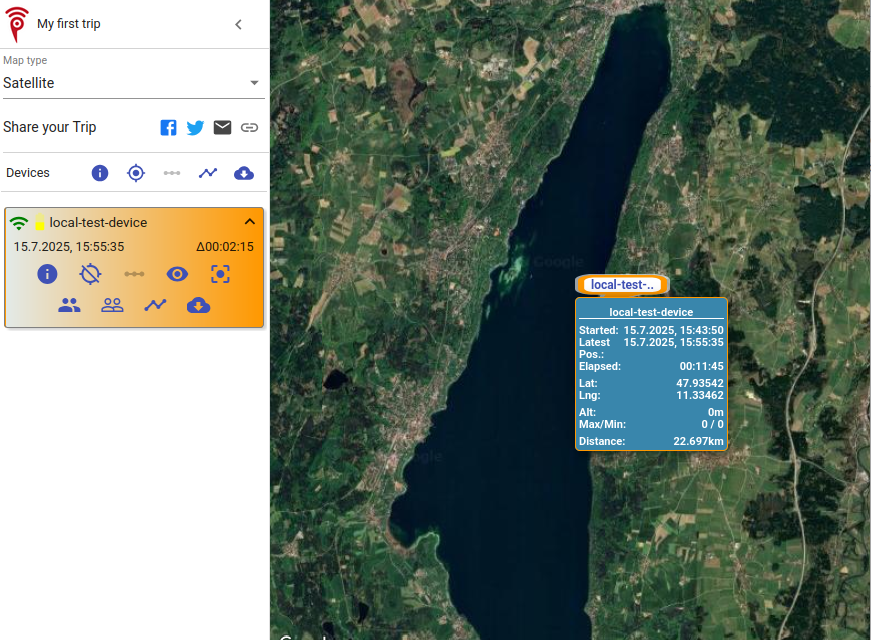
All of your devices will be displayed in the left column with a battery indicator, the timestamp of the last connection and the delta of the last two timestamps.
Tripview will always track your device, so if it sends new data with a location it will automatically update the position of the icon in the map. You do not need to refresh the page to see the new location.
Change trip data
As already mentioned, you can change the trip data after it was created. The system will recalculate the shown data and eventually show/hide some locations, depending on the time range you entered.
With this information in mind, you always can create different trips with different start and end dates, different devices and different popup information. This is the power of trips. You also can do this afterwards, think of a trip as a view on your devices and the trip settings as the filters for the view. You can simply change the settings or create a new view (trip) with different settings. The Protegear system will recalculate the shown data and eventually show/hide some locations. If you select/deselect a device, this device will be added/removed from the trip.
The popup information will also be altered accordingly.
Trip sharing
You can now share the link of the trip with your friends and family. They can view the trip by clicking on the link. The default view of the trip will display a map with the last known location of the devices in the trip. When clicking on a device, the popup window will show the data you selected in the trip settings.
Please note, that the link of this trip is not changing as long as it exists. So it is absolutely safe to share the link with your friends and family. You can also use the link of this trip in your Tripshare Handlers to send a link with an EMail, so the recipients will see your current location. We recommend using some sort of link shortener like Bitly or is.gd or other similar services to make the link shorter and easier to share via SMS or other communication channels.
Note: Sometimes Telco companies block URL shortened links in SMS, so please check this before you use it.
When not to use trips?
Trips are a great way to share your location with your friends and family. But there are some cases where you should not use trips. For example, if you do not want your location to be always visible, you should not use trips.
Yes, you can always disable the trip sharing, but often you forget to disable it and are not aware that you are trackable and visible to anyone knowing the URL. And the URL is static, so if you ever sent the link to someone in the past, the link will still work and they will see your location. The only solution is to create different trips for different purposes with different time ranges.
If you want to share the location for security relevant rescue purposes, you should try the SmartSafety product. Here we do not have public maps; instead the location is only shared with the rescue team or made available when you are in danger. But as soon as you are safe, the location is not shared anymore. You can configure this setting as you need it.